This article will cover the steps and considerations needed to build a successful MLS real estate website using WordPress, our favorite real estate theme: WpResidence, and MLSImport plugin.
Consider this as part two of the “How to Create a Real Estate Website with MLS Integration” article, a post where we explained in detail about what are the main steps you need to do and what are key facts you need to consider when building a real estate website with MLS.
This article is more like a step-by-step guide with actionable measures, and it will explain how you can build a wordpress real estate website with MLS in a couple of hours.
Let’s start with WordPress.
So, you decided to use WordPress as your Content Management System. Smart decision! WordPress is powering more than 40% of the websites in the world and is the best tool for this job.
Using WordPress with an already-made real estate theme is an excellent option for those new to website building or with a limited budget. They are easy to use and come with pre-designed layouts and features.
However, some of these templates may have only some of the features required for integrating with an MLS database.
The opposite option is to make a custom website from scratch. It will allow you to build a website with your desired features and functionality.
However, the high costs will likely be over 10k, and there are better solutions than this when you have so many professional real estate themes for WordPress.
So, after picking up your domain and hosting package, you need to install WordPress on your hosting account. If you don’t know how to do that, please go ahead and check this article: How to install WordPress
Which WordPress Real Estate Theme should I use?
The first step in creating a website with WordPress is to choose a suitable theme. A theme is a pre-designed template that controls your website’s overall layout and design.
Many real estate themes are available for WordPress, easily customized to suit your needs. However, we recommend the WpResidence Real Estate theme from Wpestate.org.
Its feature-reach software who works perfectly with mlsimport.com and powers more than 25000 thousand websites in the world.
Theme and Demo Install
The installation process is very straightforward: upload the zip file and then activate the theme. Then, add your license code and install the required plugins. You could also check these help files from the theme creators: Install WpResidence Theme
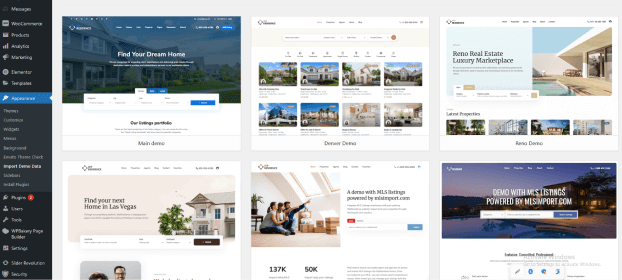
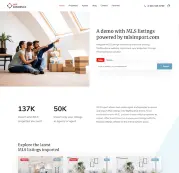
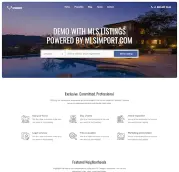
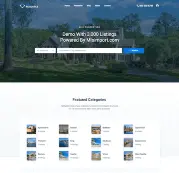
After theme installation, it is time to pick your demo. While this is not a required step, starting from something already made is much easier. In the WpResidence case, there are 41 or so demos (see them here: https://demo.wpresidence.net/#demos ) – so you have plenty of choices.
To install a demo, go to Dashboard -> Import demo and click import on the one you like. If you want to try different demos, you should reset the WordPress installation between them.
For each import, you bring new images, posts, demo listings, etc. – so you may have a lot of demo data you need to clean up later on. To rest, use a plugin like Wp Reset ( you don’t need the pro version.)
The theme and demo installation should take at most 30 minutes. After this is complete, you will end up with a functional real estate website ready to be used.
Of course, it does not have your logo or contact details, and there are other things you may want to change. But this is what we will be doing in the following steps.
Incorporate Your Brand Identity and Provide Your Contact Information
Let’s start with something easy – Uploading your logo and changing your contact information.
The first thing you need to do is prepare your logo image. Do not just upload the file you have, but check its dimensions and optimize the image. For example, the default theme logo is 160px per 45 px. So, you should resize your logo image to be around the same size.
After you resize the image, you should optimize it (actually, you should do that for every photo you want to upload.). Use sites like https://tinypng.com/, and they will give you a smaller size version of your picture.
Optimized images mean your site will load faster, which means happy visitors and better Google rankings.
Once you have the optimized image, you can go to General -> Logos & FavIcon and upload it. Please note that you can load different logo variations for different situations. For example: transparent header, sticky header., dashboard, etc.
To add your contact details is much more straightforward – go into Theme Options -> Social & Contact and start adding your details. You have a few options to fill in, from the Company name, phone numbers, and emails to social account details.
Note: You have some advanced options like login via Facebook and Google. Since you are not building a real estate portal where user can submit their listings, you don’t need to worry about those.
Reload your website – things are starting to look good.
The Property Page
Let’s move over to the property page. On your website, click on one of the essential properties, and the page that will open is called “the property page.” Every listing on your website will use this design.
Now, you may be happy with the way it looks, but at the same time, you may want a different gallery or display the content in a different order.
Nothing can be more straightforward- go into Theme options -> Property Page design and start playing with the theme options. Go into the “Property Page Layout” section and pick one of the predefined layouts. Choose the image gallery type and select the way the content is displayed.

If you use an “accordion” layout, you can go into “Selection for Accordion Layout” and change the order of each section. You can do the same thing if you prefer a Tab Layout.
There are so many possibilities that will be impossible to cover in this article. Just go through each option and fine-tune until you get the desired look.
The Search
The search form is another important part of your website. In our previous article, How to Create a Real Estate Website with MLS Integration, we explained that while you should have a search form on the home page and every other page, you should not exaggerate the number of search fields.
You want to have the visitors do a search in a matter of seconds, so do not overload the search form with a lot of fields, even if the Wpresidence theme supports that.
There are two ways you can set up the search form: via an Elementor Widget or Theme options. Use the Elementor widget if you want to add it on a specific page & location – like your homepage (we recommend this version). Or you can use the theme option settings to show it on all pages.
To change the form, start by clicking “Edit with Elementor ” in the top wordpress page bar(the whole being on the home page or the home page that holds the form). Then locate the “Search form Builder” on the page and edit it.
The widget options are straightforward, but you can always consult the help articles and videos if you need more information: https://help.wpresidence.net/article/property-search-form-builder-for-elementor/
Another thing we recommend doing is using the “Half Map” template page for the results. You can set up this by changing the “Properties list layout type for advanced search results page” in General->Appereance.
By doing this option, the search result page will have a split design – half of the screen will be with a map and half with the actual listings. Your visitors will enjoy seeing the exact home location while browsing the results.
Furthermore, there is also a search bar that you can change from the theme options -> Search section.
This part is the most complicated one – but if you read the help files and look over the help videos, you should be able to set it up.
The Property Lists
This section refers to the actual list of properties. You can create these lists on the homepage, a page that shows property per categories (taxonomies in WordPress jargon), or on a custom page where you can display the listings from your database.
For the home page or any other custom page you want to create, there are a lot of Elementor Blocks that let you create such a list. Elementor is a simple-to-use drag-and-drop builder and is very intuitive.

From the menu on the left, you need to drag your block and then play with the settings.
In this way, you can create simple lists, lists with filters, lists with tabs, etc – there is a custom block for any scenario.
The categories pages are created automatically. For each term in a category, you get a separate page – this is the WordPress way and is a good one from a usability and SEO point of view. So, if you have “New York” in the city category, you will get a page with all the MLS listings in New York.
Besides that, you can control the way properties are displayed in those lists – the so-called unit cards. There are nine different design cards you can choose from, and each one has a high degree of customizability.
The Agent Page
Each agent you add to your website will get its page. They can share it or promote it to attract clients.
It will showcase the agent’s expertise, bio, and contact details. Besides that, you will end up with an organized list of properties the realtor manages.
No agent page will be completed without a contact form. This theme feature is also a simple real estate CRM that you can manage from the admin interface, but it also lets you send listing inquiries into HubSpot CRM.
Besides the contact form on the agent page, you will get a similar one on each property page, and you also have a customizable Elementor widget that you can use to create custom contact forms.
Customize the website Design
Fact: You can customize this newly created website in any possible way and create any design. However, it depends on your (or the developer’s) technical skills.
For the non-tech person, you can go into Theme Options -> Desing, and you have several sections where you can change colors with various color pickers, adjust font size, elements margins, etc.
If you are technical and familiar with CSS, you can add some custom CSS code (that will change the look of various elements ) via Appearance ->Cutomizer and Additional CSS.
The pros will make these changes via a WordPress Child. This way, your changes won’t be overwritten when you update the main theme.
The Mlsimport.com team offers a customization package for your website. You can buy customization hours, and our professional will help us set up your website and fine-tune it to your needs. Find out more here : (*this is not a custom development package for new features)
IDX / RESO Plugin
After the website backbone is built, it’s time to integrate the MLS. I assume that you are already part of the MLS that follows the RESO standards, and you have an API key for the WEB API or Reso API.
There are many ways you can do that, but our preference goes into importing the data into your local database.
The main reason is that after you import them, you have complete control over the design and management of those listings.
Once those listings reach your database, you can create ANY design or search form and choose precisely what listings you want to show.
Mlsimport.com is one of the WordPress IDX plugins that do just that. You install it, fill in your account details, select the MLS from the list, and add your MLS connection details.
Then, decide what fields you want to import and start importing. Simple as that.
And you don’t have to worry about updating your data. This plugin will look for updates every hour and will delete obsolete listings.
Watch this short video to see how we imported several thousand listings on a Clodyways hosting using MLS Import and Wpresidence Theme.
If you want to use other Real estate themes like Houzez or Real Homes you may want to check these articles: How to integrate Real Homes with IDX / RESO and How to integrate Houzez with IDX / RESO
Extra Plugins
For example, for an MLS website, you should choose the following plugins.

Yoast Seo – for SEO
The Yoast SEO plugin is a tool for WordPress websites that helps improve search engine rankings. It guides you to optimize your content, suggesting improvements for readability and SEO.
Features include keyword optimization, readability checks, and generating SEO-friendly meta descriptions. It’s user-friendly, making SEO accessible for everyone.
WpRocket – As cache Plugin
WP Rocket is a popular WordPress plugin that enhances website speed and performance. It optimizes site loading times through various features such as caching, image compression, and minification of CSS, JavaScript, and HTML files.
WP Rocket is user-friendly, with a simple setup process, making it accessible even for beginners. Improving site speed creates a better user experience and positively impacts search engine rankings.
Note: WpRocket is not free. It costs 59$ per website.
Elementor – As Website Builder
Elementor is a widely used WordPress page builder plugin that enables users to create stunning, responsive websites with a simple drag-and-drop interface.
It offers a range of widgets, templates, and design options, allowing for extensive customization without requiring coding knowledge.
The free version of Elementor is enough to create a website with professional WordPress Themes. Get the pro version only if you need to build advanced websites.
ITheme Security Pro as a Security plugin
iThemes Security Pro (now Solid Security Wp) is a robust WordPress plugin designed to enhance the security of your website.
It offers many features to protect against potential threats and vulnerabilities, including two-factor authentication, password enforcement, and file change detection.
The plugin also monitors for suspicious activity and provides regular security scans.
This plugin is not free – it costs $99 per year, but it will definitely save you from some nasty situations.
Updraft as a backup plugin
Provides reliable backup solutions, ensuring that your real estate website’s data is safe and can be quickly restored.
Market Your Newly Launched IDX Real Estate Website
You’ve successfully set up your WordPress MLS website, and it’s all set to draw in and change leads, assisting you in making more sales. However, remember that your website won’t do much for you if people don’t know about it.
So, it’s time to spread the word about your new site as much as possible. Here’s a simple guide on where to share it:
- Engage in social media marketing by sharing listings, real estate tips, and community news on platforms like Facebook, Instagram, and LinkedIn.
- Add your website link to your business cards and the email signature.
- You could include it in your real estate mailings.
- Also, add it to your Zillow and Realtor.com profiles.
- Remember to add it to your profiles with any Realtor associations you’re part of.
Besides sharing, you should Start by optimizing it for search engines (SEO) to increase visibility on Google. Use relevant keywords, create quality content, and ensure your website is mobile-friendly.
Utilize pay-per-click advertising for targeted online ads that drive traffic to your website. Networking with local businesses and community groups can also help promote your website. Consider email marketing to send newsletters, property updates, and promotions directly to potential clients’ inboxes.
Additionally, ask satisfied clients for testimonials and referrals. Consistently update your website with new listings, blog posts, and market insights to keep content fresh and engaging.
Finally, track your website’s performance using analytics tools to understand your audience and refine your marketing strategies over time. Remember, patience and consistency are vital in promoting your website effectively.
Getting More Customers with Your MLS Website
Your website is your primary tool for gathering new leads and customers. But sharing it on social media isn’t enough to bring many people to your site.
Share E-books for First-Time Homebuyers: Many new homebuyers, especially younger ones, seek helpful guides. Create an e-book or blog post to help them, share it on social media, and ask them for their contact information to access it.
Utilize Email Marketing: Send newsletters, property updates, and personalized content to your email subscribers. Segment your audience and make sure you are sending the most relevant information.
Show Off New Properties on Social Media: Use your website’s special pages to create ads on Facebook. For example, share about new or specially priced properties and direct people to your site to learn more or get in touch.
Give Away Free Home Valuations: A great way to get attention from potential sellers is to offer free home valuations on Facebook or Google and guide them to your website to share their details. Or, use a service like Home Value Leads to make this easier.
Engage with Live Chat: Implement a live chat feature to engage with visitors in real-time and answer any queries they may have.
Collaborate with Influencers: Partner with local influencers or bloggers in the real estate niche to expand your reach and credibility.
Wrapping Up
In summary, making a real estate website with MLS listings is easy with WordPress, the WpResidence theme, and the MLSimport plugin.
This article has shown you each step to set up your site, make it look good, and connect it to MLS listings. Using these affordable tools, you can build a website that helps people find homes and makes your real estate business look professional.
Just follow the steps we discussed, and you’ll have a great website up and running in no time. Remember, keeping your website simple to use and up-to-date is the key to making your visitors happy and helping your business succeed.
Furthermore, you can watch this video and see a detailed guide about how you can build your real estate website.
FAQ
What stack does the article use to build a WordPress MLS website with thousands of listings?
The setup described uses WordPress as the CMS, the WPResidence real estate theme for the website design and real estate features, and the MLSImport plugin to integrate MLS data by importing listings into your local WordPress database.
How do you install WPResidence and import a demo site without making a mess of your WordPress install?
Install WPResidence by uploading the theme zip file, activating it, adding your license code, and installing the required plugins. If you want a faster start, import a WPResidence demo from Dashboard -> Import demo and select the demo you like.
If you plan to try multiple demos, reset the WordPress installation between imports, because each demo import brings in its own images, posts, and demo listings that you would otherwise need to clean up later. The article suggests using a reset plugin like WP Reset (no pro version required) for that reset step.
What are the practical steps to add your logo and contact details in WPResidence (and keep the site fast)?
Prepare your logo before uploading: resize it to roughly the theme default size (the article gives 160px by 45px as the example) and optimize the image file to reduce its weight. The article recommends using TinyPNG for optimization, because smaller images improve load speed and can help with Google rankings.
Then upload the logo from General -> Logos & FavIcon, where you can also set different logo variations (for example, for transparent headers, sticky headers, or the dashboard). For contact details, go to Theme Options -> Social & Contact and add your company name, phone numbers, emails, and social profiles.
How can you customize the property page layout and the search experience in WPResidence?
To change how every listing page looks, use Theme Options -> Property Page design. From there you can select predefined property page layouts, choose the gallery type, and control how content is displayed. If you use an accordion or tab layout, you can also reorder sections through the relevant selection options in the same area.
For search, the article describes two approaches: build the search form with the Elementor widget (recommended when you want it in a specific location like the homepage) or configure it via theme options to show on all pages. It also recommends keeping the number of search fields reasonable so visitors can search quickly, even though WPResidence can support many fields. For results, it suggests using the Half Map template by setting the properties list layout type for the advanced search results page, creating a split view with a map alongside the listings.
How does MLSImport connect to the MLS, and how are listing updates handled after import?
The article assumes you are a member of an MLS that follows RESO standards and that you have an API key for the Web API (RESO API). It recommends importing MLS data into your local WordPress database so you have full control over listing design and management after the import.
To set it up with MLSImport, install the plugin, enter your account details, select your MLS from the plugin list, and add your MLS connection details. Then choose which fields you want to import and run the import. After that, MLSImport checks for updates every hour and deletes obsolete listings, so your site content stays current without manual updates.
Table of Contents